
✕
Since I live in a country where cannabis seed germination is legal, I’ve had the opportunity to explore cultivation both freely and responsibly. Over time, this freedom has allowed me to gain hands-on experience, which I’m genuinely excited to share with fellow growers. Whether you’re just starting out or looking to fine-tune your technique, this guide will walk you through the most effective germination methods step by step.
Moreover, everything presented here is intended purely for educational purposes and is specifically tailored for those living in regions where cannabis cultivation is legally permitted. With that in mind, it’s important to always follow your local laws before beginning any grow. By the time you reach the end of this guide, you’ll be better equipped to choose the method that suits your needs and give your plants the strong, healthy start they deserve.
When it comes to cannabis seed germination, success truly begins with selecting the right method. Because each grower’s environment and resources may differ, it’s essential to understand what works best for your specific setup. Whether you’re a curious beginner or a seasoned cultivator, this guide outlines practical techniques, highlights common pitfalls, and shares useful tips to help you get the most out of your germination process.
Ultimately, the goal is simple: to provide clear, reliable guidance that helps you boost your success rate and start your grow with confidence. So, with that in mind, let’s dive into the methods that many growers swear by and explore why they work so well.
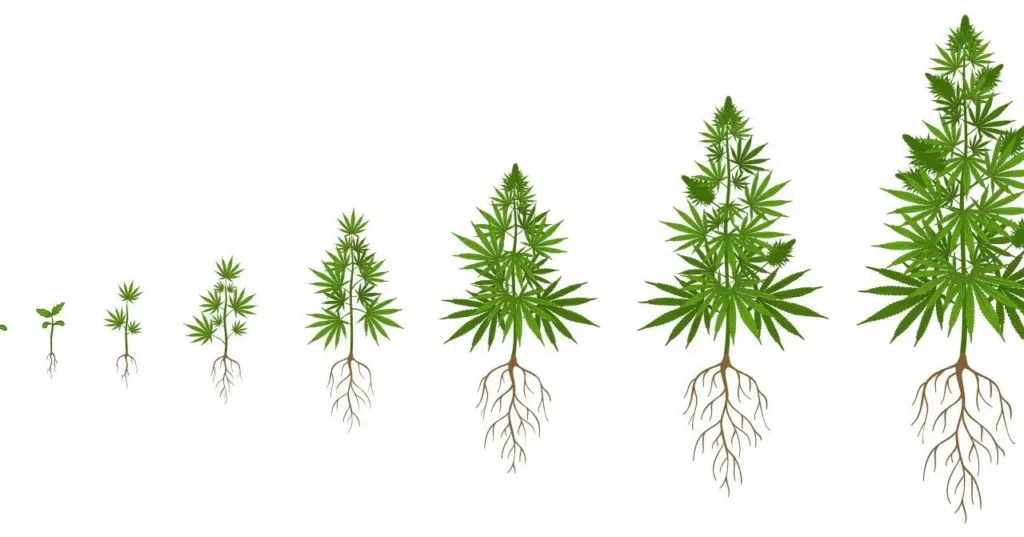
Cannabis seed germination begins the moment a seed absorbs enough moisture to activate its internal processes. As hydration increases, the seed swells, and soon after, the radicle also known as the taproot emerges by breaking through the protective shell. From there, the young seedling quickly transitions into its vegetative phase, where growth becomes more rapid and visible.
Not only is this stage the first sign of life, but it also sets the foundation for everything that follows. Therefore, a strong and healthy germination is essential if you want your plants to thrive later on. In fact, many common issues during cultivation can be traced back to weak or incomplete germination. For that reason, choosing the right technique from the start can make a significant difference in your overall success.
Each method varies by cost, control, and ease. Below are five proven techniques:
To use the paper towel method, start by lightly dampening two paper towels make sure they’re moist but not soaking wet, as too much water can cause the seeds to rot. Next, place your seeds between the layers, spacing them out so they aren’t touching. Then, to maintain moisture and warmth, enclose the towels either inside a plastic bag or sandwiched between two clean plates.
After that, store the setup in a warm, dark location, ideally between 20–25°C (68–77°F). This environment mimics natural soil conditions and encourages the seed to sprout. Be sure to check the towels daily to ensure they stay moist, and watch closely for the appearance of the radicle, which can take anywhere from 24 to 96 hours, depending on the seed.
Tip: Use pH-balanced water (around 6.0) and re-moisten towels before they dry out.
Simple and effective germination method involves using water. To begin, place your seeds in a glass of room-temperature water ideally between 20–25°C (68–77°F). Let them soak for 12 to 24 hours, but no longer, as extended soaking can deprive the seed of oxygen and cause damage.
As time passes, you’ll notice that some seeds may sink to the bottom. This is a good sign it usually means they’ve absorbed enough moisture to start the germination process. In some cases, you might even spot tiny cracks forming in the seed shell, indicating that the radicle is about to emerge.
Once this happens, promptly transfer the seeds either to a damp paper towel for continued germination or plant them directly into your growing medium, such as soil or coco. Either option works well, so choose based on your preference and setup.
Tip: Never soak for more than 24 hours. Move them once they sink or crack.
For those who prefer a more natural approach, planting seeds directly into soil is a straightforward and beginner-friendly method. To start, prepare a light, airy seedling mix something well-draining and low in nutrients to avoid overwhelming the young root.
Next, make a small hole about 1 cm (roughly ½ inch) deep and gently place the seed inside, taproot facing down if it has already sprouted. Then, lightly cover it with soil don’t pack it too tightly, as seedlings need space to break through.
After planting, give the soil a light watering just enough to moisten it without soaking. From there, place the container in a warm, humid environment, ideally between 20–25°C (68–77°F), to encourage germination. Using a humidity dome or plastic cover can help maintain moisture and temperature levels.
With this method, patience is key. Within a few days to a week, your seedling should break through the surface, ready to start its journey toward healthy growth.
Tip: Use peat pots or starter plugs to ease transplanting.
Starter cubes offer a clean, efficient, and beginner-friendly way to germinate cannabis seeds especially in hydroponic or semi-soilless setups. To begin, take your preferred cubes such as Rapid Rooters, Rockwool, or peat plugs and insert one seed into the pre-made hole in each cube. Gently press the seed down if needed, but avoid forcing it too deep.
After placement, keep the cubes moist but not soaked by misting them with clean, pH-balanced water. It’s important to maintain consistent moisture without waterlogging, which can lead to mould or rot.
Next, place the cubes in a warm, humid environment. A seedling tray with a humidity dome works well, or you can use a simple plastic container with ventilation. Aim for a temperature range of 20–25°C (68–77°F), as this encourages steady germination.
As the seed sprouts and the taproot emerges through the bottom of the cube, you’ll know it’s ready for transplanting into your final medium whether that’s soil, coco, or a hydro system.
Tip: Keep humidity domes in place and maintain a temperature of 21–26 °C.

Coco coir is an excellent medium for germination, offering a clean, fast-draining, and oxygen-rich environment that promotes strong root development. To begin, make sure you’re using pre-buffered coco coir, as this helps balance calcium and magnesium levels and prevents early nutrient deficiencies.
Next, lightly moisten the coco damp, not soaking and fill your seedling containers or starter pots. Then, plant each seed about 1 cm deep, gently covering it with the surrounding medium. Be sure not to press too firmly the seedling will need space to emerge easily.
Once planted, maintain a warm, humid environment around 20–25°C (68–77°F). Daily misting may help keep the top layer moist, but be careful not to overwater. If needed, use a humidity dome or cover to trap moisture during the first few days.
Thanks to coco’s excellent air-to-water ratio, seedlings often sprout quickly and develop vigorous root systems, making this method a favourite among hydroponic growers and those seeking fast early growth.
Tip: Pre-buffer with calcium and magnesium to avoid seedling deficiencies.
To ensure high success rates, maintain:
Once the radicle emerges, it’s time to carefully transfer the seed to its growing medium. At this stage, gently plant the seed about 1 cm (or roughly half an inch) deep, making sure the taproot faces downward. This orientation helps the root grow straight down while allowing the shoot to push upward without resistance. Whether you’re using soil, coco coir, or a hydroponic setup, consistency is key.
After planting, the next step is to gradually introduce light. Initially, a gentle light source will encourage upward growth without overwhelming the fragile seedling. As the sprout breaks through the surface, increasing light intensity over the next few days will support strong stem development and healthy leaf formation.
Starting strong with cannabis seed germination sets the tone for the plant’s entire lifecycle. In fact, a healthy beginning often leads to fewer problems later on. Whether you decide to use the paper towel method, plant directly into soil, work with coco coir, or opt for starter cubes, the key is consistency and attention to detail. Each method has its own strengths, and choosing the right one depends on several factors.
First, consider your grow space some setups may favour one method over another. Next, think about your level of experience. For instance, beginners might prefer simpler, low-maintenance techniques, while more advanced growers may lean toward precision-based methods like hydroponic cubes. Finally, factor in the specific needs of your chosen strain, since some genetics respond better to certain environments.
By weighing these elements carefully, you’ll be able to select a germination method that aligns with your goals and gives your plants the vigorous, robust start they need to flourish.